When you go online, an Internet Protocol (IP) address is assigned to your device, making it possible for someone to track your activity while also revealing your location. Fortunately, changing your IP address on Android is easy with the right knowledge (and a few simple tools).
This guide will equip you with the knowledge to change your IP address, granting you more control over your online privacy and even giving you access to previously restricted content.
Jump to…
How to find your IP address on Android
How to change your Android IP with a VPN
How to change your Android IP with Tor
How to change your Android IP manually
How to reset IP address on Android
How to find your IP address on Android
Finding your IP address on an Android device is pretty straightforward. The main difference in methods depends on whether you want to know your public (online-facing) or local IP address. In both cases, they’ll tend to be dynamic IP addresses, meaning they change over time.
How to find your public IP address:
Your Android device’s public IP address isn’t visible in your device’s settings. Instead, you can find your public IP address using a web service:
1. Open your browser, and visit an IP lookup website like whatismyipaddress.com or simply search for “What is my IP” in a search engine. Searching this in Google, Bing, or DuckDuckGo should immediately display your IP at the top of the search results.
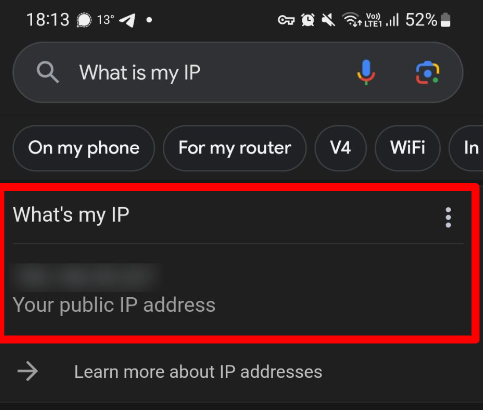
2. The website will display your public IP address, which is the address that’s visible to the outside world.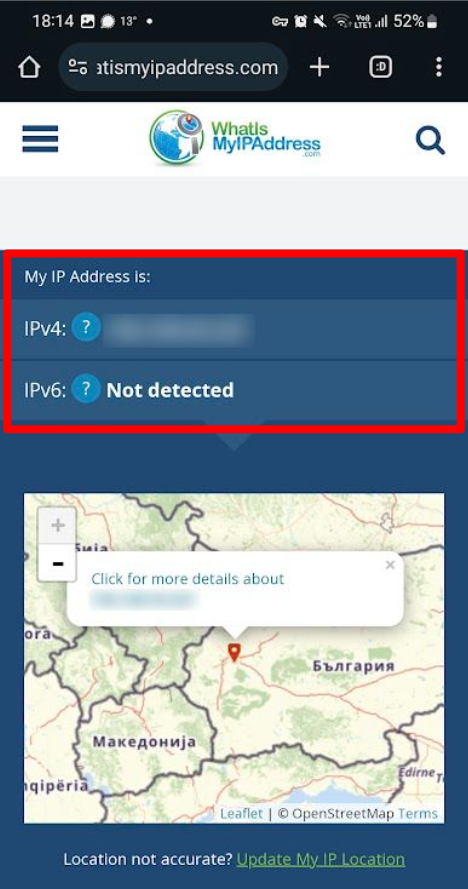
How to find your local IP address (while on Wi-Fi):
- Navigate to Settings on your Android phone or tablet. You can find this in your app drawer, or you might have a shortcut on your home screen.
- Open the Wi-Fi, Network & Internet, or Connections settings, depending on your Android device and its OS version.
- Here are some common locations: Connections > Wi-Fi, or Network & Internet > Wi-Fi.
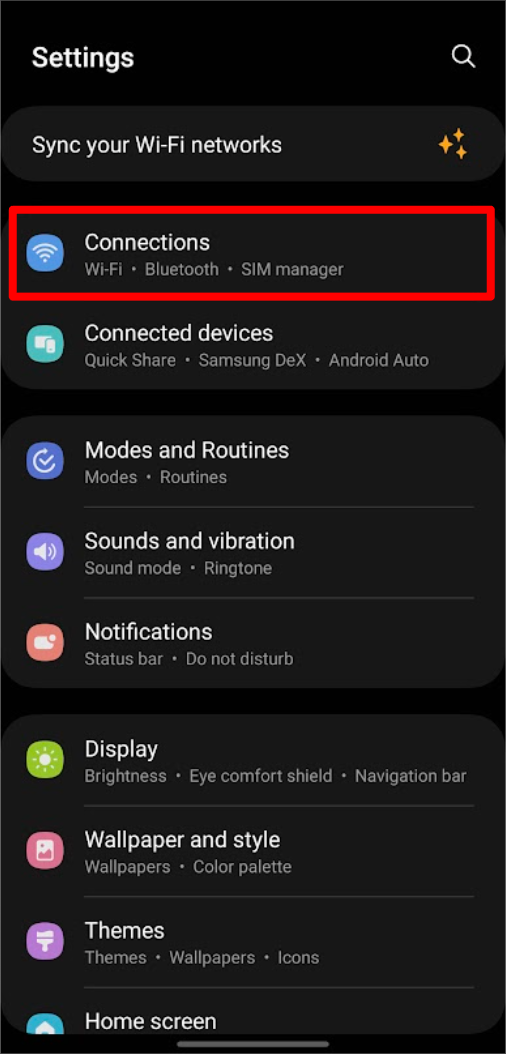
3. A list of available networks will appear; tap on the network you’re connected to.
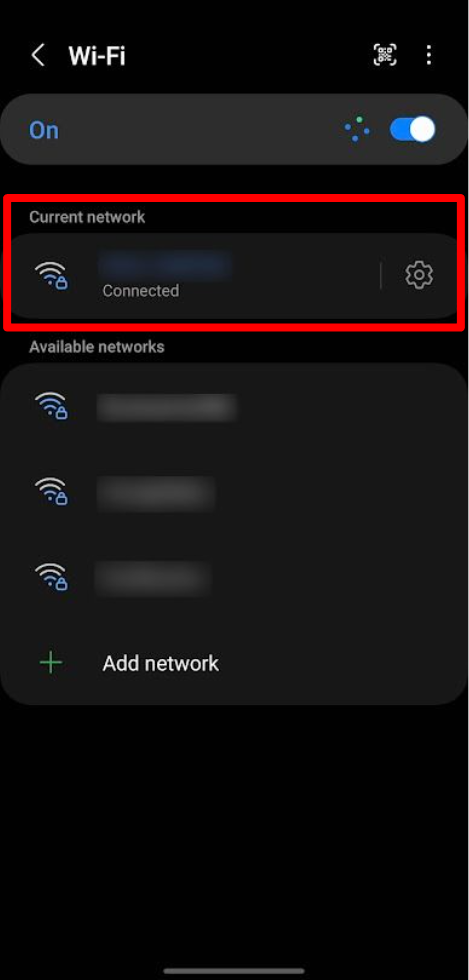
4. Tap on “View More”, “Network details”, or “Advanced settings” (depending on your phone).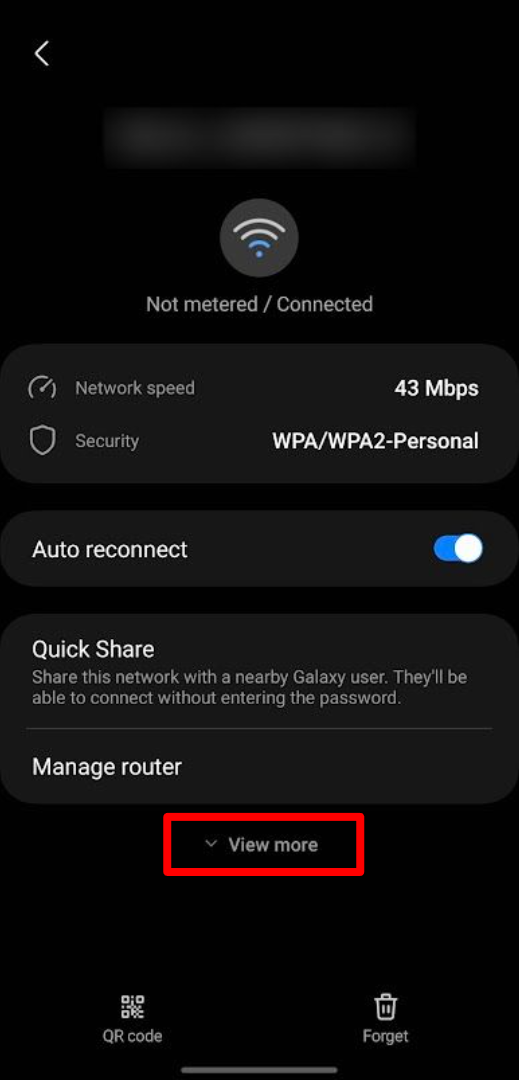
5. Scroll through the information until you find the IP address section. You might see both an IPv4 address (the shorter one only with numbers) and an IPv6 address (which may also contain letters).
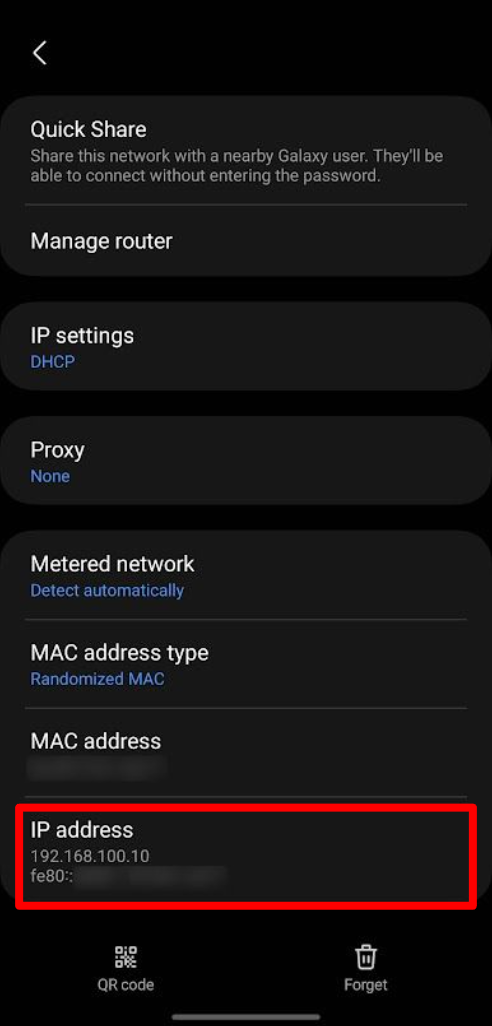
Tip: If you struggle to find your local IP address using the above steps, simply type “IP address” into the Android search bar. This should lead you straight to the info you need (usually within your Status Information menu). Note that if you’re connected to a VPN you may see a different IP address than that in your Wi-Fi settings here, due to the VPN acting like a secondary local connection.
How to change your Android IP with a VPN
A Virtual Private Network (VPN) is a powerful tool that offers benefits like enhancing your online privacy and changing your digital location. It does this by routing your traffic through a server in a location of your choice, thereby changing your IP address, and making it appear as though you’re browsing the internet from a different location (or even another country).
It also encrypts your internet connection, which secures your data and grants you a layer of privacy from prying eyes, including from your internet service provider (ISP) and anyone sharing your local network.
Here’s a step-by-step guide on how to set up and use a VPN to change your IP address on Android, covering all devices from Samsung to Pixel and more:
- Select a reputable VPN provider with strong security features, server locations in your desired regions, and a user-friendly VPN app for Android like UbiVPN.
- Head to the Google Play Store and download the official VPN app. UbiVPN also allows you to download the VPN app as an Android package kit (APK) directly from its website.
- Open the VPN app, create an account or sign in, and browse the server list. You’ll see options categorized by country or region. Choose a server location based on your needs.
- Tap the “Connect” button for your chosen server. UbiVPN offers servers across the United States and in other popular locations, including fast servers in the UK, Canada, Australia, and India.
How to change your Android IP with Tor
Tor, short for The Onion Router, is free and open-source software that anonymizes your internet traffic. Unlike a VPN, which normally routes your traffic through a single server, Tor directs your connection through a network of volunteer-run relays in various parts of the world. This changes your IP address and makes it more difficult to track your online activity or pinpoint your location.
Here’s a step-by-step guide on how to set up and use Tor on Android to change your IP address:
Through Tor Browser (for private web browsing):
1. You can download Tor Browser for Android as an Android package kit (APK) directly from the official Tor Project website. You can also find it in the Google Play Store.
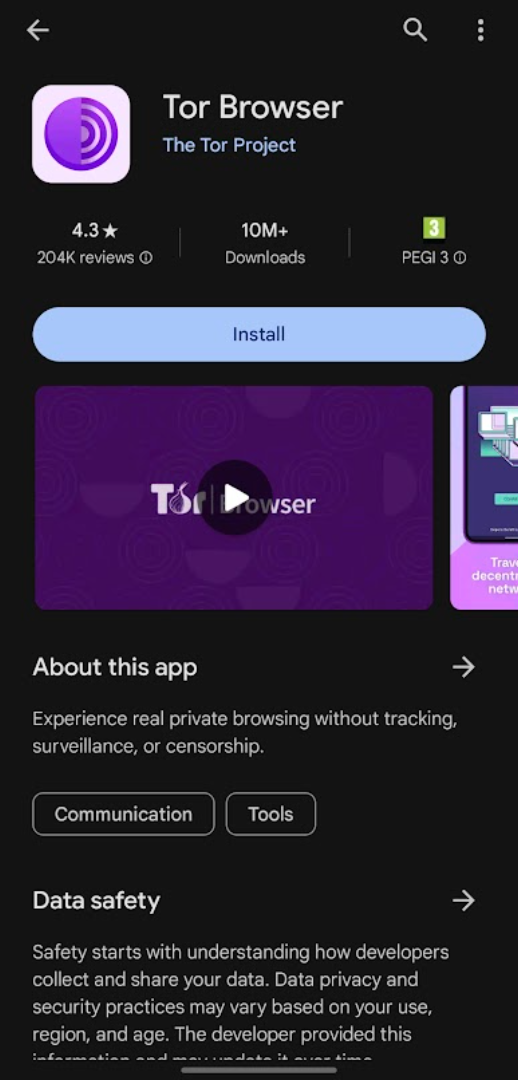
2. Once downloaded, launch the Tor Browser app.
3. You’ll see a welcome screen. Tap “Connect” to initiate the connection process. The app will establish a connection through the Tor network. This might take a while depending on your internet speed.
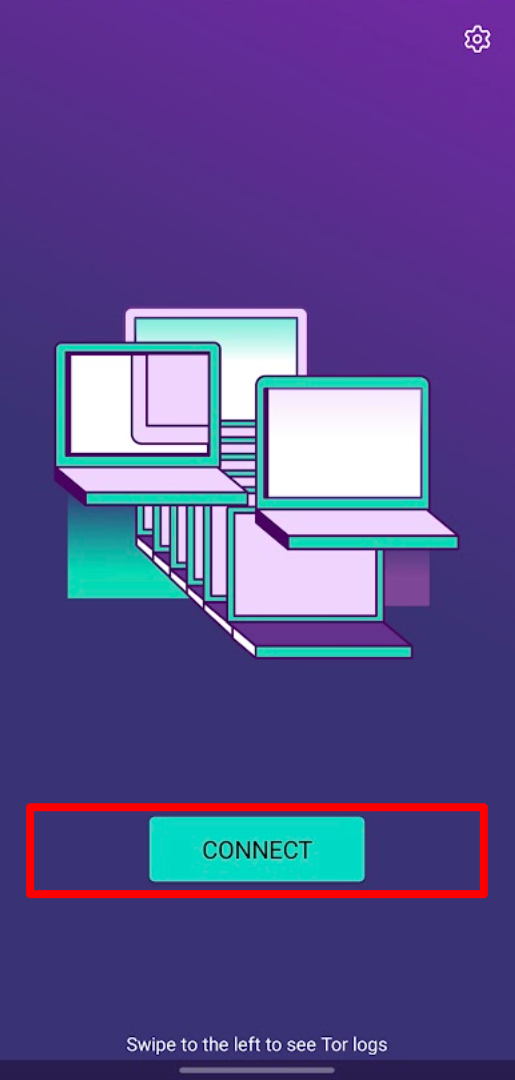
4. Once connected, a regular browser window will open. All your internet traffic routed through Tor will now have a different IP address.
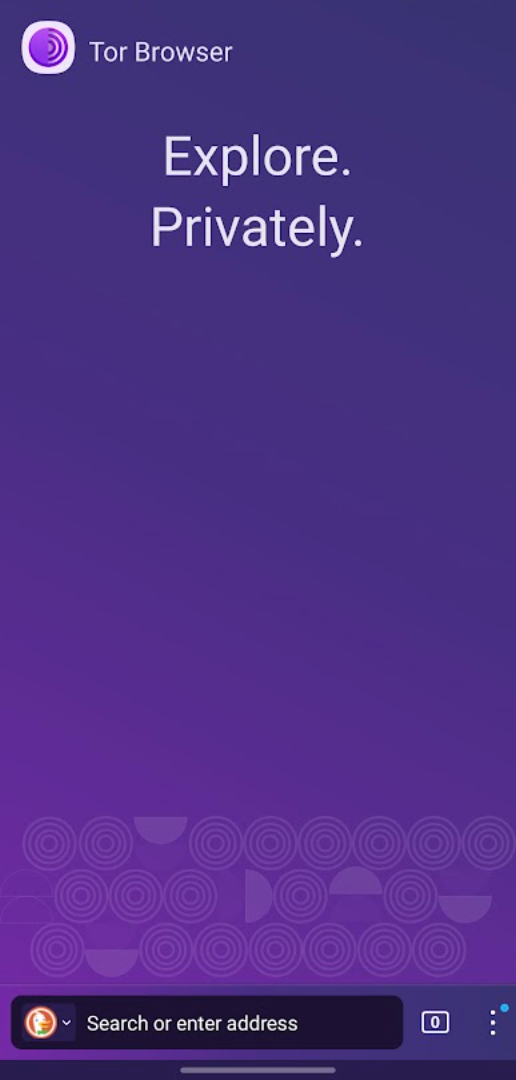
Note that while the Tor Browser offers a strong level of privacy, it might run a bit slower than other browsers (due to connection speeds, not the browser itself). Additionally, as it’s a stand-alone browser that routes all its traffic through the Tor network, it changes your IP address only within the Tor Browser itself. It’s useful if you want to browse the web anonymously without configuring other apps to use Tor.
To use Tor on Android and change your IP address for any app on your Android device other than the Tor Browser, you can use Orbot. Orbot is a free Tor proxy app that integrates with the Tor network.
Using Orbot (to anonymize traffic from specific apps):
- Download, install, and open the Orbot app.
- Press the power button in the middle of the screen to start Orbot. Orbot will begin connecting to the Tor network; this process might take a little while.
- Select which apps you want to route through the Tor network. Orbot can either route all apps through Tor (Full VPN mode) or only selected ones based on your preference.
- You can check if your IP address has changed using a web service showing your current IP address.
How to change your Android IP manually
While you can manually change your IP address on Android to a custom static IP address, it’s an approach that should be reserved for specific situations and can introduce complexities. Note that changing your static IP address only changes your IP on your local Wi-Fi network, and doesn’t affect your online IP.
A static IP can be useful for ensuring a consistent network identity for servers or devices (such as printers), resolving IP conflicts, applying specific network access controls, facilitating port forwarding for certain applications (like online games), and troubleshooting network issues.
Here are the step-by-step instructions for changing IP addresses manually through network settings (specific steps might vary slightly depending on your Android version):
1. Open the Settings app on your Android device.
2. Scroll down to find the Connections, Wi-Fi, or Network & Internet option, and tap it. You’ll see a list of available Wi-Fi networks.

3. Tap on the name of the Wi-Fi network you’re currently connected to or the settings icon next to it.

4. Tap on “Modify network“, “Manage network settings”, “Advanced options”, or a similar option from the menu that appears.

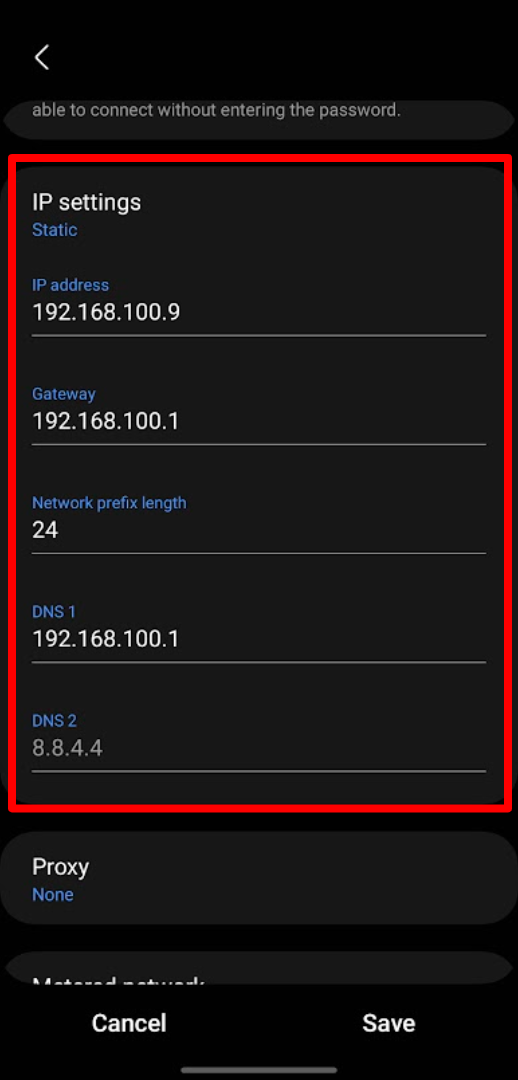
5. Find the IP settings section and change it from DHCP to Static. This step will allow you to enter your IP address manually.
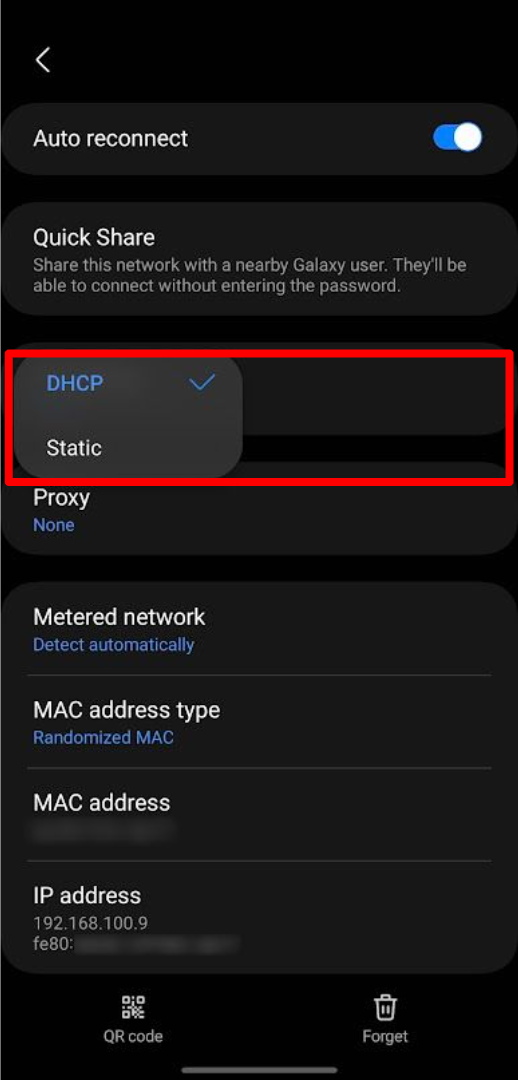
6. Here’s where you’ll need specific network information:
- IP address: Choose an unused IP address within your network’s range (consult your router’s manual or network administrator for available IP ranges).
- Gateway: This is usually the IP address of your router (often 192.1.1.1, but may be printed physically on your router).
- Subnet mask & DNS: These network settings are typically provided by your ISP and can often be left unchanged unless specified otherwise.

7. Once you’ve entered the required details, tap “Save” or “Apply”, “OK“, or a similar option.
As mentioned above, manually setting a static IP address offers benefits for specific needs but requires correct setup information. If it’s a new online-facing IP you want, a VPN is the easiest and safest way to change your IP address and enhance your online privacy.
How to reset IP address on Android
Resetting your IP address on Android may resolve connectivity issues or revert changes you’ve made for specific needs.
There are a few ways to reset your IP address on an Android device, depending on how you changed it in the first place:
On a VPN:
- Connect or disconnect: Open the UbiVPN app and connect to a VPN server. You’ll get a new IP address. If you’re already connected, disconnecting your VPN will revert your IP address to the one provided by your mobile provider or Wi-Fi network.
- Change server locations: Alternatively, switch to a different location within the VPN app and you’ll be assigned a new IP address from there.
On Wi-Fi:
- Connect your Android device to a different Wi-Fi network: Your Android will be assigned a new IP address by the new network. You could also try resetting your home router; it might be assigned a different IP.
If using Tor:
- Reset your Tor circuit: In the Tor Browser, you can request a new circuit. This changes the path your traffic takes through the Tor network, effectively giving you a new IP address. Look for the “New Identity” button in your device’s notification panel (ensure you have Tor Browser notifications turned on to see this).
If you’ve manually set a static IP:
- Change the selection from “Static” back to “DHCP”: Go back into your Wi-Fi network settings where you initially changed your IP to static.
VPN Alternatives for Changing Your IP Address on Android
While a VPN is a simple and powerful choice for changing your IP address on Android, there are alternatives you can consider:
- Proxy servers are similar to a VPN and act as an intermediary between your device and the internet. Your internet traffic gets routed through the proxy server, masking your actual IP address and making it appear as if you’re browsing from the proxy server’s location.
- HTTP/S proxies handle basic web browsing traffic and are often free or highly affordable. However, they don’t encrypt your data and might not be suitable for sensitive activities.
- SOCKS5 proxies offer more robust security by encrypting all traffic, similar to a VPN. However, they can be more expensive than HTTP/S proxies.
- Some proxies might not work with all apps or websites, especially those that require strong encryption.
- Tor offers strong anonymization by routing traffic through a network of relays. However, it can be significantly slower than VPNs due to the multi-layered routing process.
Striking a balance between security, speed, and cost is key to choosing the optimal method for changing your IP address on your Android device.
Why change your IP address on Android?
Changing your IP address on Android can be a good move for a variety of reasons, enhancing your digital experience in multiple ways:
- Enhanced privacy: Browsing the internet with an IP address not tied to you makes it harder for websites and third parties to track your online activity.
- Accessing restricted content and services: Some websites, local banking services, or government accounts restrict your access based on your location.
- Checking geo-targeted pricing: Verify pricing strategies and how a website or service might differ in another region. Some online stores adjust prices based on your location – you can even find cheaper flights by changing your IP.
- Improving online gaming experience: Play with players in specific regions.
- Bypassing censorship: By changing your IP address to a location with less restricted internet access you can bypass online censorship and surveillance. Activists, journalists, and others in sensitive situations may secure their communications and protect their identities in this way (although changing your IP alone doesn’t ensure total security).
FAQ: about how to change your IP address on Android
Are there any VPN alternatives for changing your IP address on Android?
Yes, there are several alternatives to VPNs for changing your IP address on Android. Proxy servers offer faster speeds but less security. Connecting to a different Wi-Fi network is free and easy, but availability can be limited. Connecting to public Wi-Fi (use with caution!) also changes your IP, but security risks are high.
Nonetheless, using a VPN is overall the most practical, reliable, and adaptable way to change your IP while offering a host of additional features.
How do I know if my IP address has been changed on Android?
Visit a website like whatismyipaddress.com, make note of your current IP, and then attempt to change the IP via whichever method you prefer (a VPN like UbiVPN is our #1 choice). Then you can visit the site again and compare IPs to see if they changed. This works for both Wi-Fi and mobile data connections.
Where is my IP address on my Android phone?
There are slightly different methods, depending on whether you want to find your public or local IP address on Android.
For your public IP address, you can visit a website like whatismyipaddress.com using your browser to find your public IP address.
For your local IP address (on Wi-Fi), check your Wi-Fi network details in Settings. Tap on “Wi-Fi” or “Network & Internet,” and select the network you’re connected to. Your IP address will be displayed under the network details. The process may vary slightly depending on your Android version and phone manufacturer.


